LaserDistanceLCD: Difference between revisions
No edit summary |
No edit summary |
||
| Line 7: | Line 7: | ||
== Hardware installation == |
== Hardware installation == |
||
The LaserDistanceLCD have to be mounted in a panel. The hole dimatetars have to be 97 x 72mm. Backside of the device is 45mm deeph, so leave enought place to connect the cables. Powering of the device can be done with 220VAC or 110VAC. The sensor is connected with a 1 meter long flat cable to the device. |
The LaserDistanceLCD have to be mounted in a panel. The hole dimatetars have to be 97 x 72mm. Backside of the device is 45mm deeph, so leave enought place to connect the cables. Powering of the device can be done with 220VAC or 110VAC. The sensor is connected with a 1 meter long flat cable to the device. |
||
By the instalation place, please note that a device is about 45mm bold, so You have to leave enougth place to access the cables and connectors from the sensor and from the programmer. |
|||
Revision as of 08:44, 26 November 2022
Overview
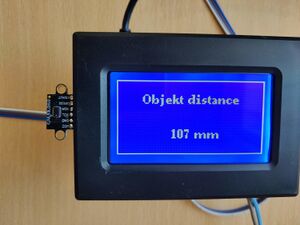
LaserDistanceLCD is a panel-mounted measuring device. It uses laser light to measure the distance between the sensor and the object. The measurement is based on the ToF (time of flight) of light from the source (sensor) and is the reflection (object).
The measured distances can be showed in milimeters (mm) or inches (inch) on 18 different languages. Configuration of a device is made with a LaserDistance software.
Hardware installation
The LaserDistanceLCD have to be mounted in a panel. The hole dimatetars have to be 97 x 72mm. Backside of the device is 45mm deeph, so leave enought place to connect the cables. Powering of the device can be done with 220VAC or 110VAC. The sensor is connected with a 1 meter long flat cable to the device.
By the instalation place, please note that a device is about 45mm bold, so You have to leave enougth place to access the cables and connectors from the sensor and from the programmer.
